Tuesday, March 25, 2008

Assembling an image to get the picture you pre-visualized


Sometimes we just can't get the image we have pre-visualized in our mind. It could be that the elements we want are not in the same location at the same time. Or it could be that the elements are there, but circumstances are such that you cannot capture the correct lighting for each of the elements at the same point in time. Here's an example of that kind of situation, and how I still got the image I wanted.

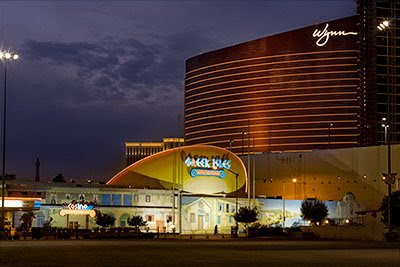
I saw this wonderful contrast between old and new Las Vegas one afternoon, and wanted to capture it in as dramatic a way as possible. I decided that the most interesting way would be to shoot it at dawn, when the neon lights of the old Greek Isles would still be lit, but the advancing sunrise would start to illuminate the glass of the new Wynn Tower with warm light, since it faced northeast. Unfortunately, when I went there the following morning, I discovered an interesting problem. The timers on the neon lights were set to shut the lights off at 6:40 AM, but the sun did not put really great color into the glass until 7:27AM. That meant that the image could not be created in one exposure because if I exposed for the neon,the building would be nearly black, and if I shot when the sunlight was right on the building, the neon would be off, creating a flat, lifeless image.
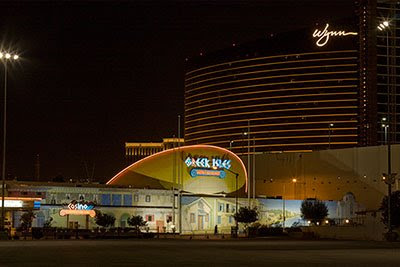
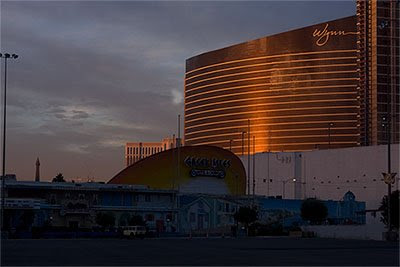


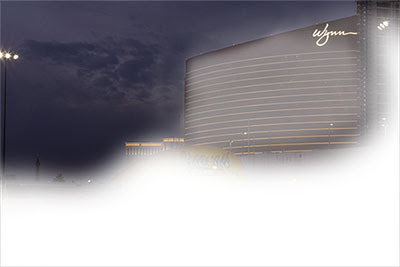
The way I solved the problem was to make sure I got the perfect exposure for the neon in one exposure, and then continue shooting to capture the perfect reflection on the glass. Once I had those, I could merge them in two separate layers in Photoshop, and end up with the image I had in my mind when I first saw the opportunity. In the end, though, I found an exposure of the sky shot somewhere between these two key elements that I thought added more depth, and used that as the sky for the final photograph.
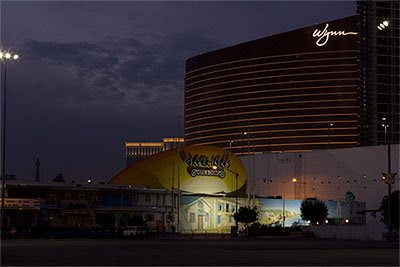


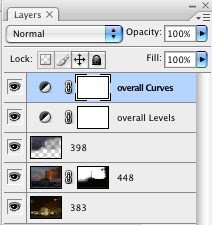
So ultimately, I used three separate exposures to make the image. Here's what the layers looked like in the assembled file, showing the various files, and levels and curves adjustments to make the image pop. One suggestion I would make is to label your layers so that if you have to come back, you know what each one is and what it does. Here, I've labeled the image numbers that I am using with their file number, and the fact that the levels and curves are overall adjustments.


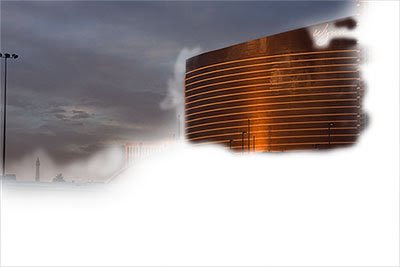
Here is what the layer for the building looked like with a mask so that the sunlit building will come through in the final.


Here is what the layer for the sky looked like with a mask so that the sky comes through in the final.


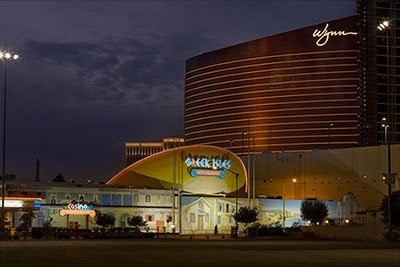
Here's the assembled image, but without the final levels and curves tweak seen in the image at the top of the article (and repeated below for easy comparison). You can see how adding these two layer adjustments makes the image come alive.


Wednesday, March 12, 2008

Look behind you


I was reminded on my recent shoot in Las Vegas of a simple but valuable truth. It’s good to look behind you. Of course there is the obvious safety reasons when you might endanger yourself by stepping back and either losing your footing, or backing up into a barrel cactus (yes, I’ve done that).

But in this case what I am talking about is looking for opportunities for images. Most times, we get absorbed in watching the light at sunrise as it illuminates the view to the west. Maybe it’s a snow covered mountain, or a reflective building. There’s magic going on, and we get hypnotized by the ever changing quality and color of the light as it progresses second by second.

What I want to suggest to you, though, is that when there is amazing light out in front of the lens, often times there is equally exciting light behind you. Sure, you could be looking back at a beautiful sunrise and the way it illuminates the clouds. But if you look at an oblique angle, you may find unique opportunities by isolating objects. Here is an example of the view looking East North East from the same spot where I was shooting west to the building in the image shown above. So always remember this simple idea to look behind you. It will reward you with great images you did not expect.


Wednesday, March 5, 2008

Photographing neon


On a recent trip to Las Vegas, I spent a lot of time photographing the neon signs downtown. There are some wonderful examples of mid century artistry all in a few block radius, and they hold great promise for beautiful images.

The key to a successful photograph here is to strike a balance between the light emitted by the signs and the ambient daylight so you can maintain a sense of the environment the signs are in. The way to do that is to shoot close to dawn or dusk when both the exposure for the lights and the ambient light for the sky and surrounding structures match. That means that you want to get to your location right around sunrise or sunset (depending on the background environment), do your scout, and find the spot you want to shoot from. I’d suggest bringing a tripod, since the exposures can be from 1second to 5 seconds long, depending on the situation, with an ISO of 100. If you don’t have a tripod with you, you could hand hold, but be sure to use a high ISO so you keep your shutter speeds up above 1/60 second. Maybe look for a surface to brace your camera against, like a wall or tree.

Because the window for when the two kinds of light are aligned to make a great exposure is small, you may have to return to the area to make images of other signs.

You have a couple of choices for setting white balance. You could go with daylight balance, and let the image take on a warm glow. Or you could set the camera to tungsten balance, which would make the sky go much bluer, or flourescent, which would make the sky go more magenta. Try playing around with the white balance settings, and see what is the most interesting to you.

Either way, if you are shooting at dawn, start 10 to 15 minutes before sunrise, and watch your histogram for when the sky or background gets too light, and the neon is no longer vibrant in color. Here are a few examples.


Notice the great saturation in the signs, the buildings and the sky.


Notice how there is a loss of saturation in all the key areas just a few minutes later.


Here's another example.


Notice the wonderful detail in the white bulbs and saturation of the sky.


Notice the loss of information in the bulbs, and the effect the ambient light is having on the neon itself as the sky gets brighter.


If you choose to shoot at the end of the day, start to shoot maybe ten minutes after sunset to see what the ambient light balance is. Look at your histogram to see how you are doing. As it gets darker, increase the pace of shooting, as the window for when the correct exposure for the lights, and the correct exposure for the ambient light will only be about ten minutes at most. You’ll know you are done when the sky is black, and the separation between it and the neon are lost.