Tuesday, December 18, 2007

Photographing Christmas Lights


Photographing Christmas Light displays can be lots of fun. There are lots of creative variations on a theme in play here, so go out and explore your neighborhood. Or, plan ahead for your next year’s Holiday card by shooting your own display. Here’s what you need to know.

Generally, people wait to shoot until it is dark out, but that is too late. The lights may reproduce well in the photograph, but all the other detail in the image will be lost. The goal is to match the correct exposure for the lights with the ambient light at dusk so there is detail in the lights, and detail in the buildings and sky as well. That means that you want to get to your location right around sunset, do your scout, and find the spot you want to shoot from. I’d suggest bringing a tripod, since the exposures can be from 1second to 5 seconds long, depending on the situation, with an ISO of 100. If you don’t have a tripod with you, you could hand hold, but be sure to use a high ISO so you keep your shutter speeds up above 1/60 second. Maybe look for a surface to brace your camera against, like a wall or tree.

Frame the picture so you include some environment. A snow covered lawn creates a wonderful foreground that can reflect color, and the sky can give you a wonderful rich blue to compliment the reds and yellows of the bulbs.

You have a couple of choices for setting white balance. You could go with daylight balance, and let the image take on a warm glow.

Or you could set the camera to tungsten balance, which would make the sky go much bluer. This is a time tested approach to shooting at dusk, most notably practiced by the legendary photographer, Pete Turner. Take a look at his classic image called Road Song to see what I mean.

Either way, start to shoot maybe ten minutes after sunset to see what the ambient light balance is. Look at your histogram to see how you are doing.


As it gets darker, increase the pace of shooting, as the window for when the correct exposure for the lights, and the correct exposure for the ambient light will only be about ten minutes at most.


You’ll know you are done when the sky is black, and the separation between it and the buildings are lost.


Sunday, December 16, 2007

Holiday Performances Part II


O.K. You’ve shot the pre-production pictures as outlined in the last article, your talent is headed backstage, and you are back to your front row seats. Here are the important things to remember. First, double check to make sure your flash is not going to fire. It’s dangerous for the actors, and in most cases the distance from the stage is greater than the range of the flash anyway, so it won’t add to the lighting in any case. Kind of like using your flash at a football game.

Next, if you are shooting with a digital camera, set your ISO to somewhere between 800 and 1600, based on the lighting in the theatre. As always, keep in mind that the higher the ISO, the more noise you will see in the images. I find that in most cases, I can use ISO 1250 as the highest acceptable speed. But that’s my camera. Test yours in advance so you know your limit.

Now set your camera to Shutter Priority (TV), and choose a speed that will not give you camera shake. My recommendation would be 1/125 or 1/160. If you have steady hands you might be able to go to 1/100 or 1/80. Some of the newer cameras have anti-shake mechanisms built in, and that could be a big help too. Testing in advance will create a sense of ease during the show, knowing in advance what the results will be rather than worrying about what could go wrong.

Finally, if you camera has the capability to shoot in RAW format, select that, maybe in combination with a mid-sized jpg. The RAW format is like a digital negative that gives you some additional flexibility to adjust the image beyond what you can do with a jpg. So I always recommend shooting RAW.

As soon as the curtain goes up and the lighting is at production levels, shoot a picture, and check your histogram. As shown in earlier articles, the key is to make sure the shadows and highlights are not clipped. If the camera is doing a good job of metering, great. If histogram is not what it needs to be, use your exposure compensation button to make an overall adjustment. Then shoot another test image and check that histogram to see if the results are better. Continue to adjust until you have what you need.

If you are shooting film, go for a film with an ISO rating in the 800-3200 range. I would suggest a negative fim because it will have more exposure latitude than slide (transparency) film. Set your meter for matrix or evaluative metering, and off you go.

If your favorite actor is a principal player, great. There will be lots of opportunities to get close ups of them alone. But even if that is the case, I like to tell a story, and show some of the other action. So I would suggest shooting pictures that give a sense of the production itself.


Shoot some images that incorporate a group of the actors and shows the set, then move in closer by zooming in or changing to a longer lens. Now you can shoot images of just a couple of the players. And finally, do get those tight in shots that you know you’ll want to put in a frame and put on the wall or mantel.

Once you’ve covered the key elements of the story, and have your beauty shot, experiment! Try shooting with a slower shutter speed, maybe in the 1/8 to 1/30 range, to give a sense of the movement. Blurred images can have romantic, more unique look.

Wednesday, December 12, 2007

Holiday Performances Part I


‘Tis the season for school performances, so here are a few tips for getting the best photographs of the little ones.

First, unless your kids are performing at Carnegie Hall or The Dorothy Chandler Pavilion where sears are reserved, you’ll want to get to the performance hall early to stake out a seat. The reality is that because you are not going to be allowed to use a flash (check you manual as to how to shut it off before you get to the hall), you are limited to shooting hand held. As a result, you need to shoot with as short a focal length lens as you can to minimize camera shake. The rule of thumb here is that you would set the shutter speed to the reciprocal of the lens focal length. So if you are shooting with a 200 millimeter lens, you would shoot at 1/200 of a second. All well and good if you are shooting outside. But shooting with the available light of a performance, even with a high ISO setting, it will be almost impossible to get to a 1/200 shutter speed. So that means you want to shoot with a 100-135mm maximum focal length. And that means you have to be pretty close to the stage to get close in a your favorite actor. So stake out your seat as close to the front as possible but above stage level so you can see the actor’s feet. And try to get as close to the center as you can. Volunteering to shoot another parent’s kids when they have the seat you want could be a great negotiating strategy. Have someone guard the seat for you so you can go to a great opportunity for images--make-up and wardrobe.

Assuming you’ve called in advance (or you are a major donor to the theatre department), you should be able to get access to the staging area. I recommend this highly, because there is a wonderful sense of vitality and spontaneity to this environment, and there are abundant opportunities for candid, journalistic images. Try taking close ups of makeup being applied, wardrobe going on or being adjusted, and the actors strutting their stuff.

Here are a few examples of this kind of image from a performance I shot recently.


In the next entry, I’ll talk more about shooting the actual performance.

Thursday, November 29, 2007

Exposure Compensation in Snow


As a more detailed explanation of the need to compensate when shooting in snow, here’s a good example.

Remember that all light meters give you an exposure that would place whatever is covered by it as 18% grey. So if the scene is mostly snow, the exposure will be underexposed significantly. The solution is to use the exposure compensation feature of your camera. On a point and shoot, it may be a little button you push on the back of the camera, and then rotate a dial. On a DSLR, like the Canon 40D the shutter button pushed half-way down, you simply rotate the dial on the back of the camera.

If you are shooting with film, you can start with a minus one stop setting and bracket a stop in each direction. If you are shooting with a digital camera, simply check your histogram to make sure the highlights don’t blow out. Experience will help guide you once your done this a bit.

Above is an example of what happened by just letting the camera decide exposure in shutter priority mode. The accompanying histogram below shows loss of detail in the shadows (whenever your histogram butts up to the left edge), and that the snow will appear grey (the highlight value is far away from the right edge).


Now here is an example increasing the exposure 2/3 of a stop. Notice in the histogram that all the shadow detail has been held, and the highlight values have increased to make the snow near white.


Saturday, November 24, 2007

Winter Photography Tips


Winter can be one of the best times to shoot outdoors, and the key to a successful shoot is being properly prepared. Here’s what you need to know.

Clothing


The key here is to dress in layers, wearing fabrics that will wick moisture away from the body (simply put, no cotton). The concept of layering is that you can dress on the light side when you are exerting your hiking into a location and raising your temperature, but have more layers to add once you are just standing around waiting for the perfect light.

I generally start with a polypro turtleneck, a fleece vest or jacket on top of that, then a water and windproof shell as the outer layer. Bottoms are again layered, first with polypro tights, then fleece, then a pair of waterproof pants. Venting zippers on the jacket and pants are valuable for regulating body temperature, Hats are an important defense against losing body heat, and I have a range of hats and headbands available for different weather conditions, including a down face mask for the extreme situations.

Interestingly, I’ve found the key to staying warm is to make sure my feet stay warm. Depending on the temperature and depth of snow, I would at least wear a pair of waterproof hiking shoes with wool or fleece socks. When it gets colder, I’ll move to boots that have wool or synthetic liners. And on really cold days, I’ll go to “Mickey Mouse” boots that have a layer of air between the footbed and the exterior . When the snow depth gets to be an issue, I’ll couple any of these boots with gaiters to keep the snow from getting in between the boots and pants.

Next is dealing with your hands, and again I suggest having multiple solutions. At a minimum, I’ll use a thin pair of polypro glove liners with sticky lines or dots to maintain good tactile ability. From there, I might layer a pair of fingerless fleece gloves on top of them. Next might be a waterproof shell if it is snowing. Another option would be fleece mittens with flaps that open back to fingerless gloves below.

The last two items that are critical for shooting in the snow are sunscreen and sunglasses. Snow will reflect the light back into your face, and it is easy to get sunburned in a short amount of time. But it’s not only your sking to be concerned about. Early on, I did an assignment for a ski resort, shooting most of the day facing into the sun while I skied backward capturing the action. The next day I could barely open my eyes. Now I shoot with glacier glasses, and as odd as it seems, it is well worth it for the protection they give.

Equipment

Probably the most important issue, especially now with digital cameras, is battery power. Cold weather saps the energy of batteries, so be sure to have backups with you. I generally keep these in pockets close to my body so they stay warm. Hand warmers, available at sporting goods stores, can be valuable here as well. If it is really cold, I may tuck my camera inside my coat to keep it warm as well.

Be prepared to protect your camera and accessories from weather. There are some great rain hoods and waterproof casings out there, but you can also use baggies to keep things dry. They’re also valuable in keeping condensation off your gear when you bring it inside. But keep in mind that condensation forms on the outer most layer, so if you have your equipment inside a camera bag or backpack, that would not be an issue.

A microfiber cleaning cloth or chamois is always good to have to keep things dry. And if it’s snowing, and I have the room, I’ll even carry a small umbrella so there is some distance between the lens and the first flakes of snow captured in the image.

One thought is to work with a waterproof camera in snowy situations. There are several point-and-shoot models out there, and they take the worry out of winter shooting as long as you are not planning on large blow ups from the images you create.

If you are shooting close to sunrise or sunset, you’ll probably want a tripod along with you. My recommendation would be to use one made of carbon fiber for two reasons. First, they are lighter, and equally important, do not suck the heat out of your hands when you are working with them.

. Finally, a good backpack is helpful for carrying your gear, extra clothing, water and snacks. A backpack cover gives even more protection in keeping things dry, so those are recommended as well.


So, now that we are ready, what are some of the tips for shooting in winter? Here are the three key things to remember.
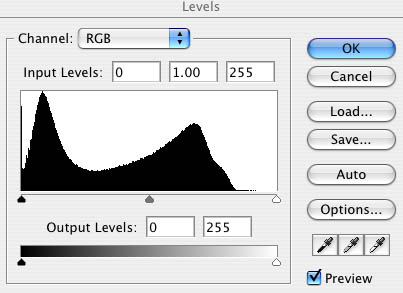
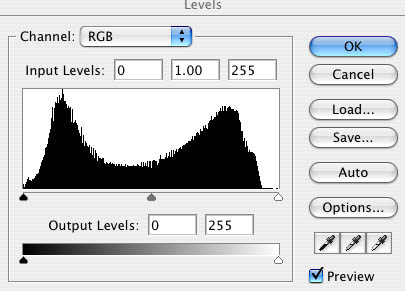
Watch your exposure


All light meters give you an exposure that would place whatever is covered by it as 18% grey. If you were to shoot a white card and a black card, the exposure for each would be exactly the same--mid grey. Try it sometime. How does that affect our shooting in winter? If you shoot a scene that is a mix of sky, trees and snow, maybe not that much, since you have a combination of light and dark values. But if the scene is all snow, the exposure will be underexposed significantly. The solution is to use the exposure compensation feature of your camera. If you are shooting with film, you can start with a minus one stop setting and bracket a stop in each directon. If you are shooting with a digital camera, simply check your histogram to make sure the highlights don’t blow out. Experience will help guide you once your done this a bit.

Watch your timing

Because light bounces off snow, shadows fill in quickly. So if you are shooting mid-day, the light is going to look uninteresting. The best time to shoot a landscape would be early or late, when the light is low, and there are nice shadows to give the image contrast.

Another good time to shoot landscapes is before sunrise and after sunset, when the light wraps around objects without harsh shadows. You can even play with color to give the sense of coldness by using tungsten based film or adjusting your white balance (for digital cameras).


Watch your light

If you are shooting a landscape that includes snow, look for angles that will show the texture. Shooting so that the sun is coming in from one side of the frame or the other would help, as would shooting with backlighting.


And if you are shooting portraits, best to position them so they are backlit so that they will not have dark eye sockets.

Friday, November 23, 2007

Lecture Room Photographs

OK, so you go to a conference, and the speaker has valuable information to share, but you didn't take a class in court stenography beforehand. What to do? Use your point and shoot camera to take pictures of their Powerpoint or Keynote presentation. But before you do so, here's the important tip to make sure you get good results.

Because the room is dark, your camera, in auto or program mode will most likely try to use the onboard flash. The problem, though, is that the flash actually washes out the screen so it is harder to see the material.


The solution is to change your ISO to the highest number your camera is capable of (400-1600), and turn off the flash. Now set your camera to aperture priority mode, and set the aperture to it's widest opening (ƒ4 to ƒ5.1 is common), and shoot the photograph. Because you may be shooting at a lower shutter speed, be careful to hold the camera steady. The result will be an image that is much easier to read.

Sunday, August 26, 2007

Rule of Thirds

One of the keys to good composition is to understand how to frame what you see. A tried and true tool is the Rule of Thirds. If you were to divide the picture area into nine equal boxes, and then use the intersecting lines as guides for placing your subject, you’ll find it often creates a stronger composition.

Just take a look at the first image where the cyclist is centered in the image.


Now look at the second image with the rider is further to the left.


If we overlay the grids from the rule of thirds, you can see that the cyclist in the first photograph is in between grid lines. The image is missing something, and that is a sense of balance.


Now look at the second image with grid superimposed, and notice how the cyclist is now close to an intersecting line. The result is that it creates a more balanced image that gives the rider more impact. What’s great is that some cameras have a grid overlay as an option in your display menu, so you can take advantage of this great tip anytime you want.


A great book on this subject is Real World Digital Photography

Look for the Light

Here's another situation where we come upon a wonderful visual opportunity. But sometimes the first place you see doesn't have the kind of light quality that makes for a great image. Here, because the light is coming from behind the building, there is nothing to help define the shapes.


By walking around the building (I went from the east facing side to the northwest facing side), I was able to take advantage of the late afternoon light to capture brilliant highlights and deep shadows that made the building much more three dimensional.
In fact, if I were to think about the five most important things to look for before creating an image, one of them certainly would be to scout your location carefully and observe how light falls onto your subject.

Wednesday, August 1, 2007

Keep It Simple

It’s normal to want to take a picture of a beautiful scene you happen upon. You hop out of the car, and shoot a picture that takes in as much as you can see with your bare eyes. But most times, including too much hurts the composition because the viewer does not know what to focus on. Rather than having an immediate response to the image, the viewer’s eyes wander all over the frame trying to take it all in. Just look at this image to see what I mean.


The best solution is to simplify the number of elements in the image as in the image seen below. By driving a bit further, literally a few hundred yards, I found a spot where the elements were reduced to just four—sky, clouds, mountains and trees. The result is an image with more punch, and a stronger ability to hold the viewer's attention.

Look for Color

There are so many ways to look at color. Of course there is the obvious scene bursting with vibrant, rich color like this image of an athlete.


But you also want to be on the lookout for times when color is subtle, even close to monochromatic. Here’s an example of how a foggy day can create soft, romantic light and a dramatic high key image. In fact, one of the best suggestions I can make to be grateful for rain, snow and fog. They create marvelous opportunities to capture color in unusual ways. Just be prepared to protect your equipment, and yourself, from the elements.

Watch Your Angle of View

Changing your angle of view can have a big impact on your photographs. In the first example, the picture is shot from eye level, which would probably be the first inclination you would have in taking the photograph. And the subjects were just asked to stand in the field, also the simplest and most common approach that comes to mind in that situation. The result is that your subjects seem distant, not only because you are taking in so much visually, but also emotionally, since you are looking down on them.


But by asking the subjects to sit on the ground, bringing the camera down to just below their faces and coming in closer, you can create a more intimate, warm and engaging portrait. That's because by bringing the camera to below the subjects, you not only are looking up to them literally, but pychologically as well. It's a wonderful tool for creating emotional punch, one that works in the reverse as well. Shooting from an extreme high angle creates the pyschological impression of looking down on the subject.


So the next time you shoot a portrait, resist the urge to just point and shoot. Instead, have fun playing with the angle of view, either high or low, for more impact and to make more of a statement.